

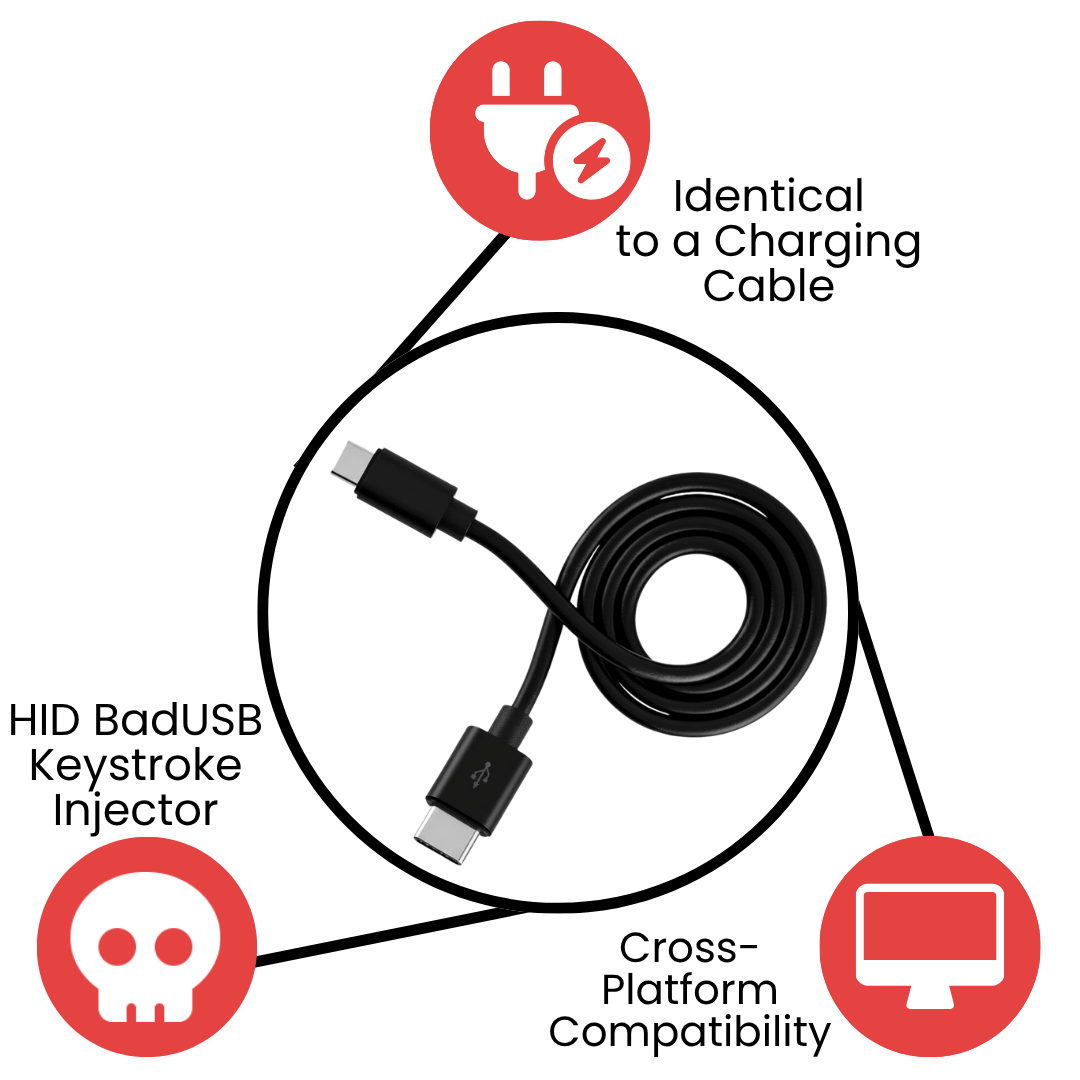


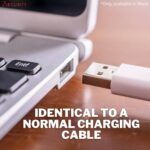
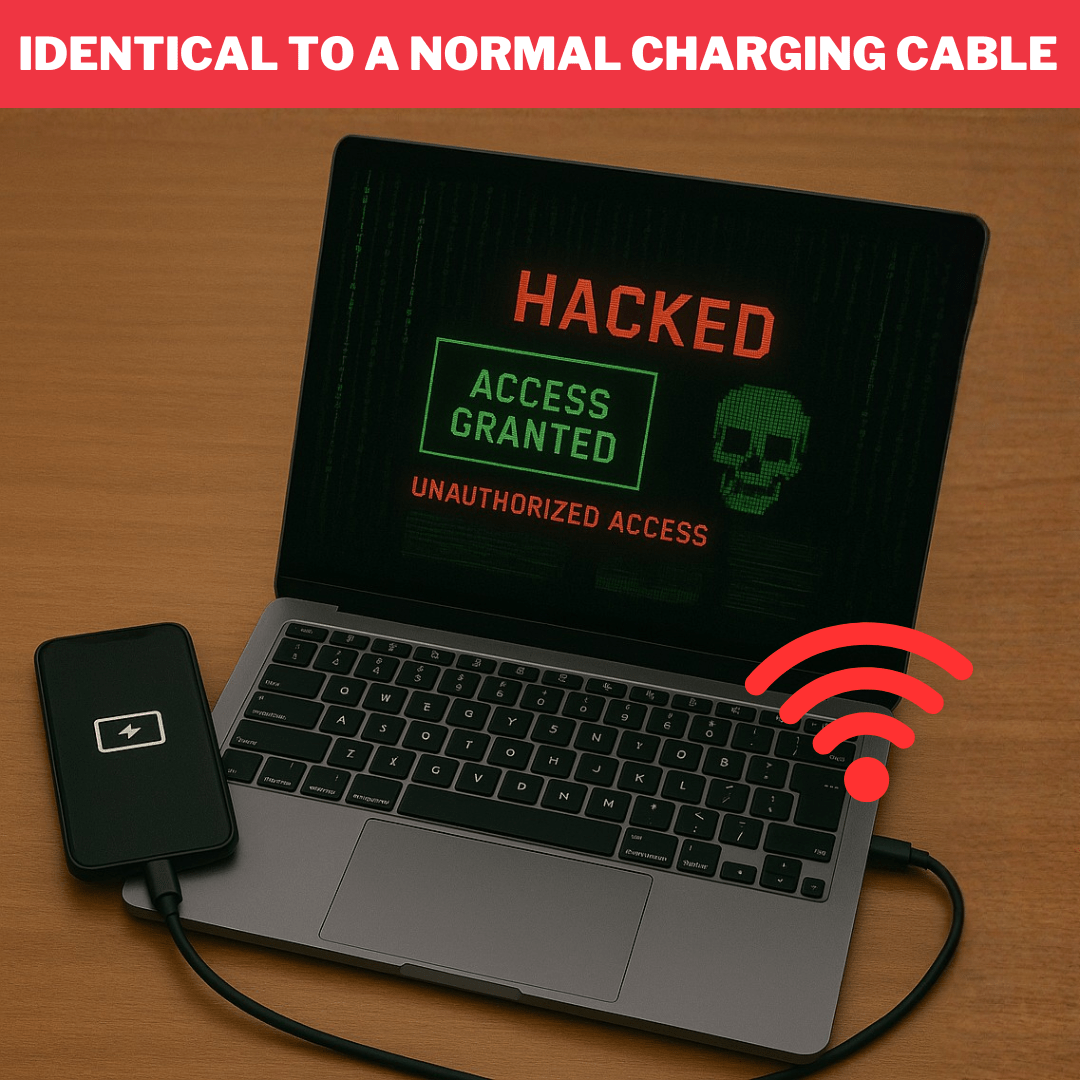
Identical to a Charging Cable
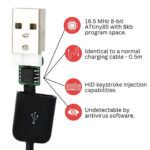
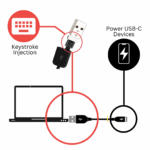
HID BadUSB Keystroke Injector
Cross-Platform Compatibility
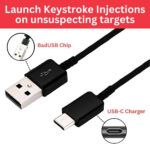
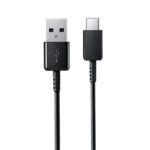
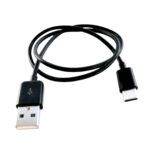
ZS Venom BadUSB-C Keystroke Injection Cable
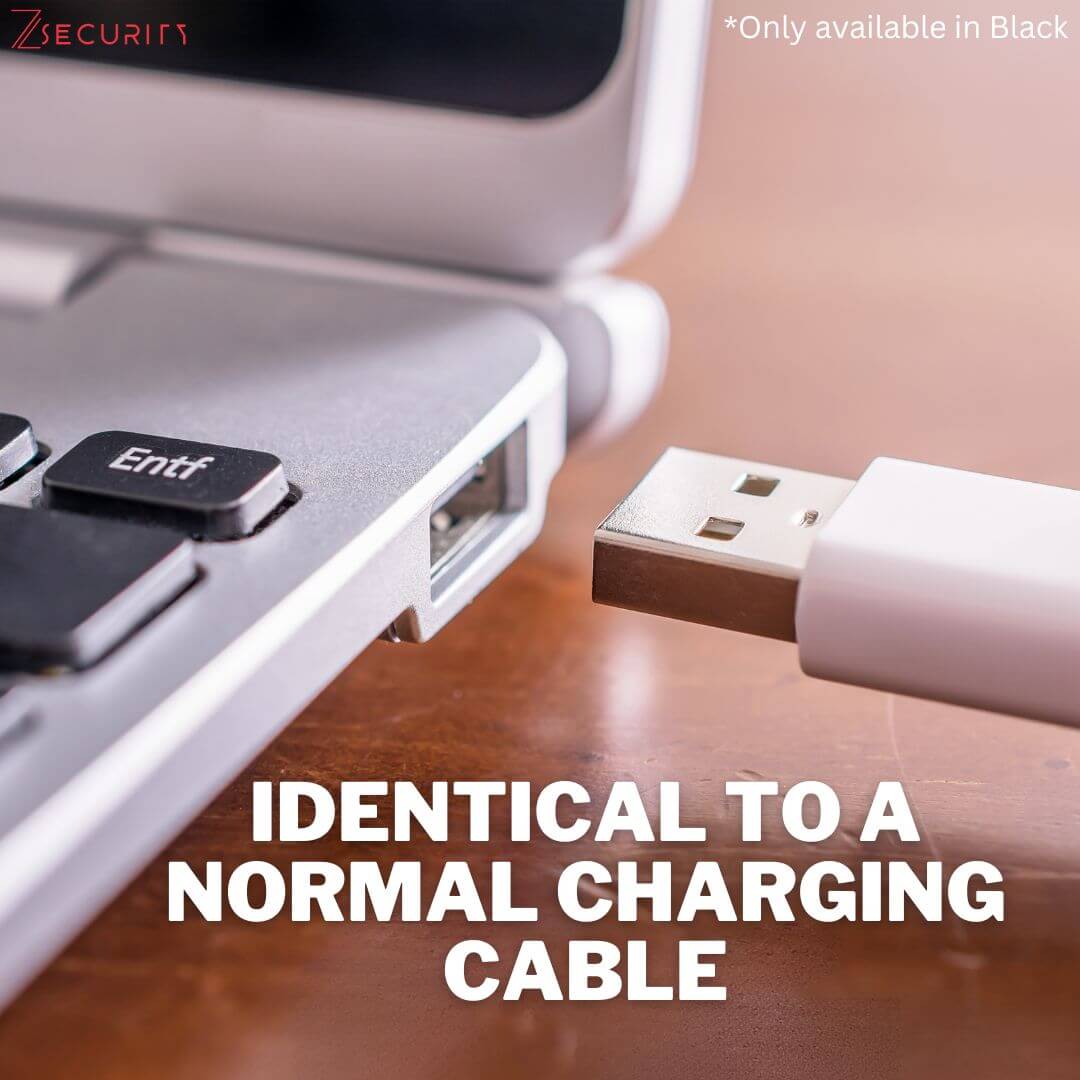
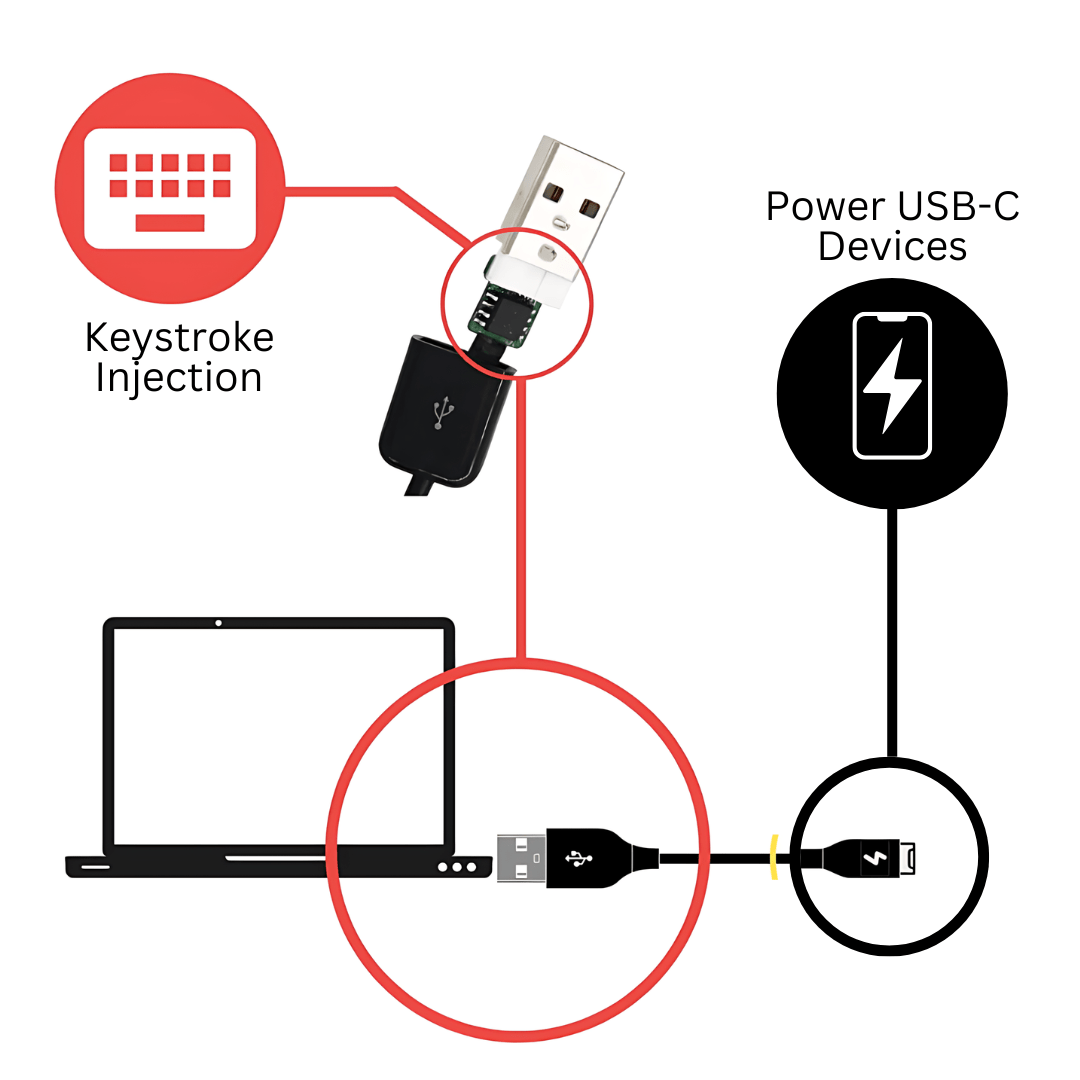
The ZS Venom is not your ordinary charging cable! This is a BadUSB Keystroke Injection cable, made for Ethical Hacking and Cybersecurity enthusiasts. This USB-C charging cable looks identical to a normal charging cable, the only difference is it can execute keystroke injection attacks when connected to a computer!
It automatically registers itself as a keyboard and sends pre-configured key-strikes (payloads) to the machine that it is connected to, allowing you to execute a large number of attacks to harvest information or even gain full control over the target device. The ATtiny85 is neatly disguised inside an ordinary looking USB-C charging cable.


Compare ZSVenomPRO vs ZSVenom
ZSVenomPRO does much more than just HID BadUSB functions
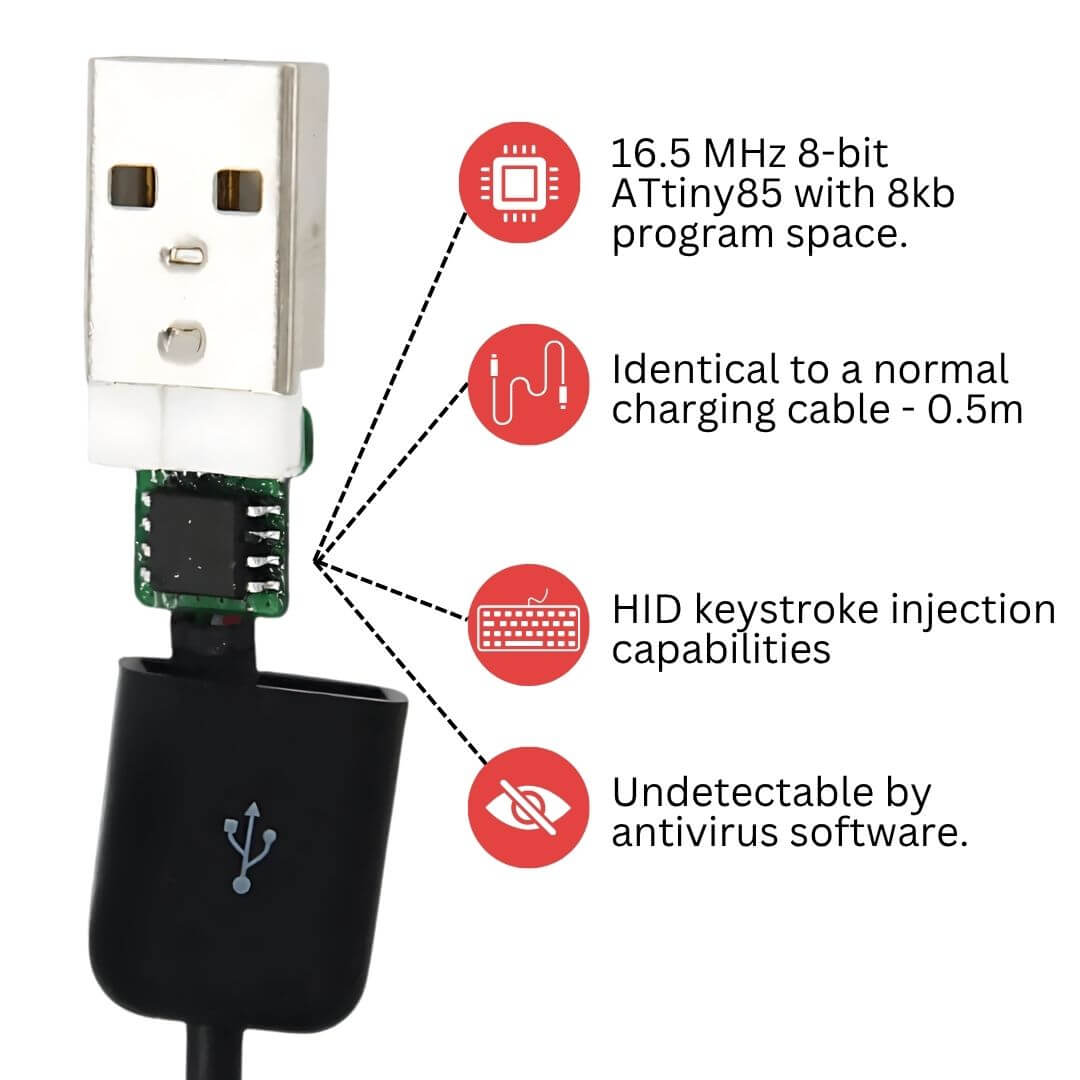
Key Features
- Multi-Platform Compatibility: Supports Windows, macOS, and Linux systems, ensuring versatility across different operating environments.
- Customizable Payloads: Upload and configure your own scripts to simulate a wide range of attacks, providing a comprehensive security assessment.
- Indistinguishable Design: Identical to a normal charging cable, providing covert operation without raising suspicion during testing.
- Powerful Microcontroller: Equipped with a 16.5 MHz 8-bit ATtiny85 microcontroller with 8KB of program space, ensuring reliable performance and ample capacity for complex payloads.
Applications
- Hack computers using built-in or own payloads using BadUSB attacks.
")

Setting up your ZS Venom cable in 3 steps!
Step 1
Download the Arduino IDE
Step 2
Adjust the Arduino IDE settings
Click File >> Preferences
Paste the following into the Additional Boards Managers URLs and click ok: https://raw.githubusercontent.com/zSecurity-org/BadUSBArduino/refs/heads/main/package_badusbarduino_index.json
Go to Tools >> Board >> Boards Manager and search for "BadUSB Cable".
Click install on the entry.
Tools >> Board >> BadUSB Cable select "BadUSB Cable".
The environment is now set up and ready.
Step 3
Upload your own Payloads
Go to Sketch >> Upload. Once compiled, you will receive a prompt to plug in the device. Video Tutorial
Complete your Pentesting Tool Set with our Bundles
Hacker Starter Kit
Save $15 with this bundle
► + Free 1 Month zSecurity Trial VIP membership.

$99.97
BadUSB Silent Intrusion Kit
Save $10 with this bundle
► + Free 1 Month zSecurity Trial VIP membership.

$59.97
BadUSB Silent Intrusion Kit Plus
Save $10 with this bundle
► USB Data Blocker
► + Free 1 Month zSecurity Trial VIP membership.

$69.97
FAQ
What do you use the ZS Venom for?
Ethical Hackers and Cybersecurity Experts use BADUSBs/Cables for a variety of purposes including, Penetration Testing, Security Training, Incident Response Testing, Research and Development and Red Team Exercises to mention a few examples!
Does ZS Vemon BADUSB-C Keystroke Injection Cable charge devices?
Yes the cable does charge devices that use USB-C cables. Note: this cable does support Fast Charging and above.


Reviews
There are no reviews yet.